Monday, 6 February 2017

Express Tracker as a KISS TNC

"AX.25 style Packet Radio is dead".That's what the old timers will tell you. They'll tell you it gave way to the Internet because the speeds were better and you didn't have to modify your rig. They may be right in that statement but when you're in a Red Cross shelter with no network access Packet Radio may be your only way to move that pile of ICS213 forms that have just arrived at your station.

In my search for a modern Terminal Node Controller (fancy term for data modem) I've looked at all sorts of designs. Readers of my blog will be familiar with my various attempts to find something that will connect to the USB port of a modern PC/Laptop for OEM type uses.

I _think_ I've found it. Say "hello" to the Express Tracker from RPC-Electronics. It's a small translucent box that's not quite as big as a packet of cigarettes. It can do APRS tracking when fitted with a GPS RX, act as a APRS Digipeater and most importantly for my needs has a _full_ KISS implementation.


KISS? What's that? I'm not gonna go into that here but suffice to say that it's a way of using a radio modem without all the overhead of a Terminal Node Controller getting in the way. Go here for more about KISS. KISS is interesting to me (and hopefully you too) because it presents a standard interface that many software packages can talk to.

So in my scenario I foresee our local ham club deployed at Red Cross shelters across the town after a severe storm. The local OEM has requested that all traffic be submitted digitally via ICS213 and similar forms. The problem is that there is little to no power to run email and fax machines etc. Enter Packet Radio. It'll run from your laptop and use the same power supply you are running your station from.

I'm not going into how you would operate your chosen package or why this one is better than that one. What I will do is show you how to add your Express Tracker to your Windows and Linux PC's. Mac users _may_ be able to follow the Linux instructions.

OK, Windows first. We are going to use AGWPE to attach to the ET. It's all trivial really. Plug in the USB cable and install the drivers if necessary. Then fire up AGWPE and configure your TNC as below. Your port number may be different to mine. Click OK and then restart AGWPE.


So now you have AGWPE running your ET. Fire up your favourite packet application such as Outpost Packet Manager (pictured below) and configure it to use AGWPE. That's it. You're now on Packet Radio using your Express Tracker.


Here's a few shots of a mail swapping session I had between OPM (Windows) and my real TNC;


And this is OPM talking to JNOS on Linux;


Linux is much simpler (isn't it always?). The modem comes out of the box pre-configured for KISS @ 19200bps. Simply plug it in, find out what the serial port is called (/dev/ttyACM0 on my machine) and then either kissattach /dev/ttyACM0 $PORTNAME $IPADDRESS to run the ET under the native AX.25 tools or add the following to your autoexec.nos file ...

# ---------- Express Tracker specific ----------
#
# We are using a USB<>Serial interface which forces hardware handshake. KISS spec says no handshake of any type so we have to turn it off
shell stty --file /dev/ttyACM0 -crtscts # nip out to the OS and turn off the RTS/CTS on the USB adapter
pause 1 # wait a second for the command to complete
attach asy ttyACM0 - ax25 etrack 1024 256 19200 # attach the Express Tracker to JNOS as a KISS device @ 19k2bps
# That's all. Carry on with the config
#
And that's how it's done!

Thursday, 2 February 2017

Bet you've never seen this before?

I keep getting called for Jury Service. Whilst I have no objection to doing my civic duties the law in the US of A is such that I am not allowed to serve on a Jury. I'm not an American y'see. But that does not stop "them" from calling me anyway. And every time I have to trot down to the court and prove that I'm not eligible to serve. And every time they call me anyway.

I might have won this battle though. I got this in the mail randomly today. I bet you've never seen this before?


Tuesday, 22 November 2016

Outernet Receiving System

Have you seen this? It's a free filecasting (one way file transmission) service that is delivered by satellite. "Satellite, you say? Sounds expensive." Not at all. And the skill level required to access this media source is also quite low.


So what's this then? It's an L-band patch antenna for an Outernet receiving system. It is currently sitting just outside of my living room window looking up at the Inmarsat satellite at 98 degrees west.  

As you can see from this picture, the Outernet receiving system is little more than a USB based software defined radio. In my case it's plugged into a C.H.I.P. computer (similar to a RPi) which then makes the received files available via it's WiFi interface.


I bought the development/DIY kit from Outernet for $79. Mine did not come with the USB battery as I already had one of those.


Aligning the system was trivial. One of the advantages of the L-band (1.5GHz) is that as long as you have a clear sky you can "see" the satellite. You do not need to be aligned with the satellite as you would with a Ku (TV) band satellite. That said, if you can align the antenna you will increase the reliability of the data downlink. As you can see from the picture above, I got quite a good downlink from my window.


So far all I've received is a few Wikipedia pages and some weather maps etc. I also received the latest AMSAT keplarian elements too.

The system runs at 2400bd and so is very slow. But considering that its free I can live with it. The ultimate goal of Outernet is to launch 3 Cubesats which will circle the earth and have a faster downlink.

Tuesday, 18 October 2016

Ham radio install in a 2015 Chevy Sonic

My girlfriend has a Chevy Sonic. She also has a newly minted ham licence. And as if all that wasn't enough it was recently her birthday. She has a Yaesu FTM-100D. The job of installing it fell to me.

In a previous posting I installed the antennas onto her car.

On this outing we'll be installing the radio itself. The main body of the radio will reside in the cargo shelf at the back of the car whilst the control head, mic and speaker will be mounted in the front.

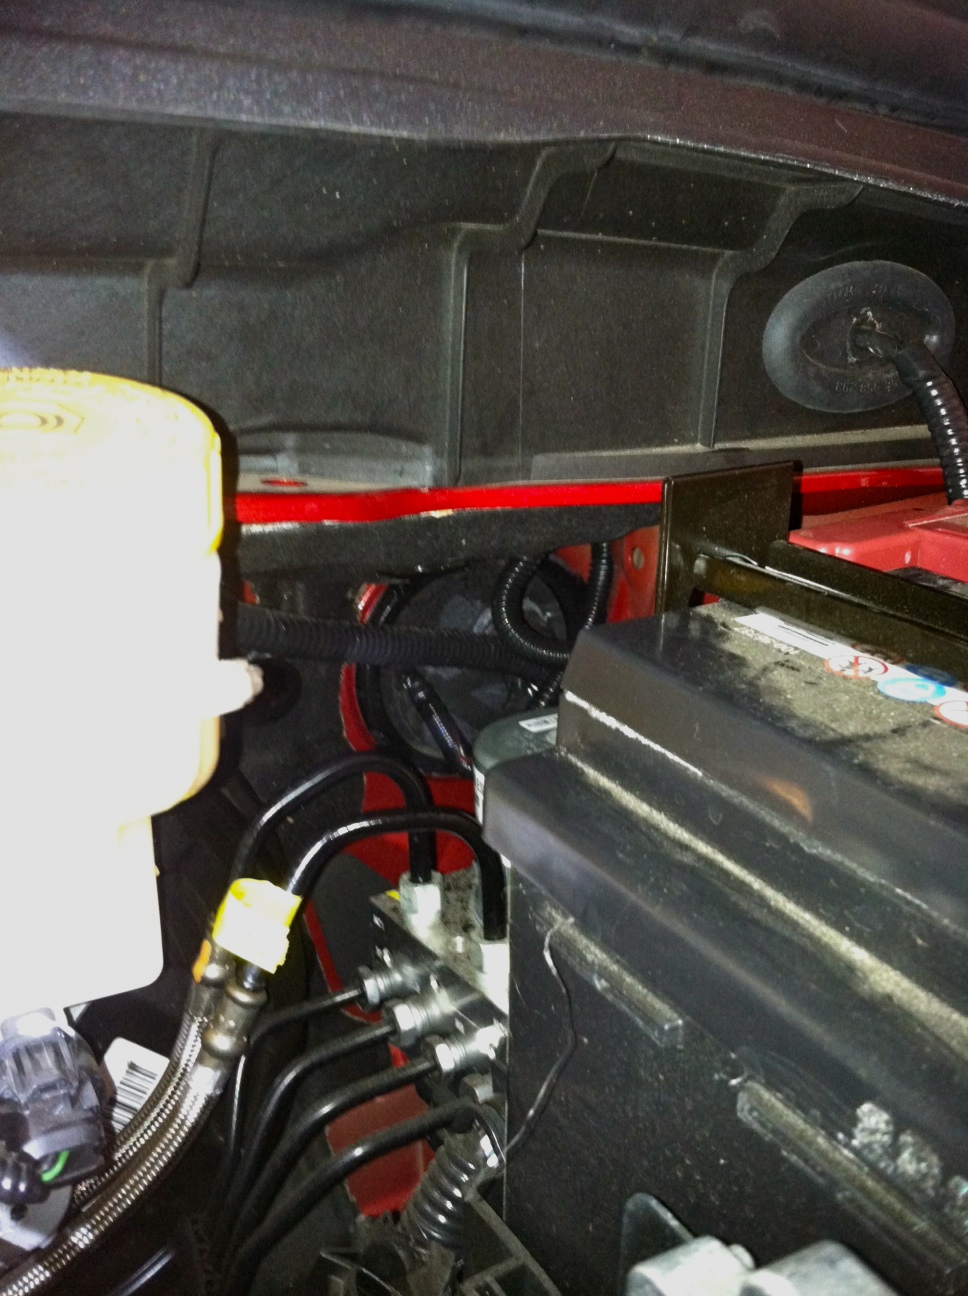
Let's get some power to the back of the car. Get yourself 15 feet of #12 or #10 black and red wire. Cut a hole in the large grommet in the firewall and pass the wire through it. It's easy to find right behind the battery. You can reach it from under the dashboard too.

Do not connect the wires to the battery just yet.


Now that your wire is pulled through from the engine bay, remove the covers from the drivers side door sills and feed the wire through to the back of the car. You will stop when you get to the back seat. Remove the flooring from the trunk to expose the spare wheel. Feed a cable snake from the trunk side of the seat to the drivers side door. Attach your cable and gently pull it back to the trunk. 


You may now replace the flooring in the trunk. I terminated the trunk end of the wire with 45Amp Anderson PowerPoles. In turn the cable will feed a fuse box for other equipment. Return to the engine bay and install a 30Amp fuse on BOTH the red and black wires then attach them to the battery. Test the wiring (you should have 12V at the trunk end of the cable). If all is well install the radio into the trunk.


Using the supplied remote head mounting kit, connect one end of the long black telephone style cable to the radio body and feed the other end under the rear seat, across the trans tunnel and into the drivers zone. Do the same with a remote speaker. The microphone will require you to obtain a 6P6C telephone cable. Make sure that it is wired 1-1 rather than 1-6 (reversed). I ended up buying a 25' cable from eBay and then cutting it to length before installing a new plug on the end. As you can see in the above picture, I fed all my control wires through a piece of cable dressing so as to keep them all together.


 Finally, using an RJ45 cable coupler, connect the mic to the mic cable. Also connect the head to the black control cable and position all items in your favoured position. I used 3M double sided tape to secure the head to a spot just below the radio control screen.

Don't forget to put your car back together again.

Monday, 10 October 2016

Never had one of these when I was in Dublin

I went out with a friend a few weeks back to an "Irish Pub". Staten Island is covered in "Irish Pub" establishments. The nearest any of them have been to Ireland is, well, they haven't.

It was with great humor that I read the menu of the place we went to. They offered a Dublin Works Burger". It's ingredients were listed below the title and are anything but Irish.


American and Pepper Jack cheese, Jalapenos, Thousand Island dressing along with the usual veggies all served on a Brioche bun. A classic Dublin Burger if never there was one.

2015 Chevy Sonic Antenna Install

I installed 3 antennas onto a 2015 Chevrolet Sonic this weekend. It was a simple install that will in turn be attached to some ham radio gear that is yet to be installed into that vehicle.

After discussion with the owner it was decided to install the main antenna supporting the voice radio into the middle of the roof. This will allow the optimal radiation pattern for the antenna. However, this would require removing the head liner from the vehicle to allow access to the center of the roof. A compromise was found by installing the antenna directly above the rear passenger dome light which was only slightly off-center to the vehicle.


The Dome light is easily removed by gently pulling on it. It will fall out and be held by it's supply cable. Remove the supply cable by pressing the clips found on either side of the connector. Remove the light and put it in a safe place for later restoration.

Now you are left with a rectangular space. Find the center of the space by drawing an X from the diagonally opposite corners of the hole. Drill a small pilot hole at the center of the X from the inside to the outside of the car.

Now drill out the hole you've made with increasingly larger drill bits until you have a hole that will correctly accept your antenna mount. My NMO mount required a 3/8ths hole but others require 1/2 inch or even 3/4 inch holes. Increasing the size of the hole in steps makes for a neater hole and reduces the risk of buckling the metal with the torque of the drill.

Clean up any shards and splinters with a slightly larger drill bit but be careful not to create a larger hole. Install the antenna mount into the hole you've made making sure to weather seal it where necessary.

Now we need to pull the coax from the mount into the back of the vehicle (the radio will be going into a pocket in the trunk). Feed a snake (I used a wire coat hanger) from the back of the car to the antenna mount, attach the coax to it and then gently pull it towards the back of the car.


Depending upon the style of the mount used you may have to insulate the bottom parts of the mount so as to prevent them shorting on the light. A strip of duct tape would be ideal for this. As you can see, my mount had a plastic cover already. Reconnect the dome light and reinstall it back into its hole. We are finished with this part of the installation.


I did say that I installed 3 antennas. For the remaining 2 I used a combined GPS antenna with NMO mount. This was installed at the back drivers side of the roof. I didn't get any pictures of the install as it started to rain just as I had drilled my pilot hole. But, here's the finished product ...


The flat part at the rear of the mount is the GPS antenna whilst the front part is an NMO mount. As you can see, the rain made taking pictures of the install impossible. 


Tuesday, 4 October 2016

Jamboree On The Air (JOTA) 2016

It's October already! Where has the summer gone?

If you've been around ham radio for a while you will have heard of the Jamboree On The Air (JOTA). It happens on the 3rd full weekend in October and is an opportunity for Scouts all over the world to get on the radio and chat with each other via ham radio.

 Do the clickey thing here


I've taken part in every JOTA event going back to 1988 and can honestly say that I've enjoyed every one of them. I was even involved in the startup of Jamboree On The Internet (JOTI) which is held concurrently over the same weekend.

If you've got a few spare minutes over the JOTA weekend please keep an ear out for the Scouts and drop in for a chat. It's an excellent opportunity for them to earn a few merit badges, discover ham radio and learn about peoples from all over the world.


I got this certificate from the now defunct International Listeners Association (hi, Trevor!!). Back in those days the UK Scouts had to receive 50 radio stations as part of their Communicator merit badge. Of course, they all complained that it was too hard so I sat down with them before breakfast on the Sunday morning and managed to log my required 50 in the time it took to get breakfast cooked (we were camping at the Scout hut).